There are many ways to capture a catch light in portrait photography. We will be discussing how to create a catch light effect using artificial and reflection lighting. Here are some tips for capturing a beautiful catch light:
Creating catchlights in portrait photography
Creating catchlights in portrait photography is one of the best tricks to evocatively portray your subject. Using a key light, you should aim it at the subject's eyes. Typically, the key light will be the brightest light source in the frame. This will help you capture a more dramatic portrait. It is possible to ask your subject for a circle, and then face the sun.
Also, you can use a reflector to make a catchlight. It reflects the light back into your subject's faces. Concrete or sand are good options. Another option is to use the color on the subject's shirt. You can choose to use white, but you could also add color by using a red shirt. Try different angles. Many photographers suggest putting the catchlight at the 10 and 2 o'clock positions.
Techniques for capturing catchlights
One of the most common photography tips is to make your subject face the light source. You should position your subject so that the light shines on them. Shooting with your subject's back to the light source will result in shadows cast on their faces and relegate the catchlight to the background.
Placement of the catchlight is critical for portraits. Photographers often place the light source in the eyes of the subject at either 10 or 2 o'clock. These positions are considered the most natural when shooting under mid-day sun. Others prefer to position the light source above their subjects' heads. It is possible to place the catchlight in a way that places it above the subject.
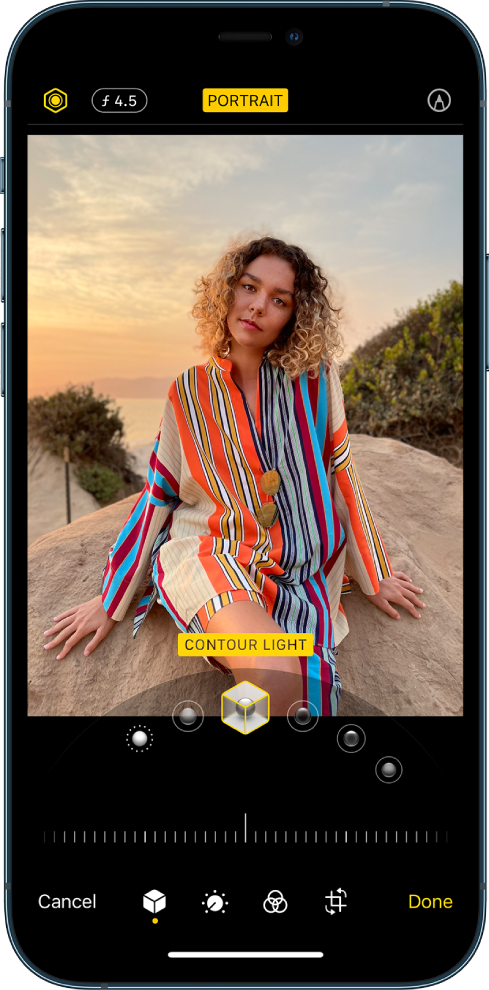
Artificial light is used to create catchlights
The location of the light source in a photograph is vital for creating catchlights. The light source should be placed between the subject and the camera. Place the light source at a slight angle in order to reflect into your subject's eyes. Avoid placing the light source too high. This will cause the subject to cover the catchlight with their eyelids. Alternately, you can place the light source slightly lower than your position, and to the left or the right of the camera.
If you'd rather not use natural light, you can also use artificial light. A reflector can be used to bounce the light into the subject's eyes. You can also filter the light with a softbox, umbrella or translucent umbrella. Make sure you place your subject close to a window. The more the light hits your subject's eyes, the more it will reflect off the subject's face.
Making catchlights that reflect
There are many options for creating catchlights in photos. To bounce light back onto your subject's face, you can use reflectors. A window or reflective surface can also be used. Your catchlight should look like the sun's natural reflection in the subject's eyes. You can get useful information by concentrating on your subject's eyes. Read on to learn more. We've all seen photos that were created using only a single light source, but there are many other ways to achieve this effect.
First, examine the catchlight. It is easier to study catchlights when they are on flat surfaces. After you've determined the type of light source and the location, you can create the catchlight. However, you must be careful not to overdo it, since too many large catchlights in the eye can be disconcerting. Try experimenting with large catchlights.
FAQ
What is the rule or thirds?
The rule to thirds is a great way to create interesting compositions. It divides your image in nine equal parts, vertically and horizontally. This creates three main areas where you want your subject to appear. These are the top (3rd from the left), middle (3rd from center) and bottom (3rd from lower right). These areas are useful for positioning your subject in your frame.
The rule of threes can also help you avoid placing important items too close together. They might not have enough space to make an impact on the eye if they are placed close together. If you put them too far apart, they might lose focus because there isn't much room around them.
Which Lenses Do I Need?
The most common question beginners ask is, "what lens should I buy?" There are many options. It can be difficult to make a decision.
The good news is that you don't necessarily need to buy a new lens every time you purchase a new camera. You can always add lenses later.
There are three types possible lenses.
-
Wide Angle Lens (14mm - 24mm): These lenses give you a wide angle of view, allowing you to capture more of your subject. You can zoom in to improve image quality.
-
Standard/Normal Zoom Lens (28mm-70mm): These lenses let you change the focal length while still maintaining excellent image quality.
-
Telephoto Zoom Lens (70mm - 200mm): These lenses are great for capturing distant subjects. They let you focus on your subject even though they appear small in the frame.
You can also combine these lenses to create different effects. To capture close-up details, you can switch between a normal and telephoto lens.
How can I improve the quality of my photos on my phone
Great photos don't require expensive equipment! Amazing photos can be taken with your smartphone.
All you need to do is to be able to use the features of the program and to master some basic techniques.
There are many apps for iOS and Android devices that can edit and share pictures.
Here are five tips that will help you start taking better photographs.
-
Set Up Your Camera App. The camera app should be pre-installed on the device. If your camera app isn't installed on your device, download it from Google Play.
-
Use Filters & Effects. Filters and effects can be used to modify the appearance of your photograph without touching your image.
-
Adjust the exposure. You can adjust the exposure to control the brightness of your photo.
-
Shoot In The Right Light. Photographing in bright lighting makes it easier for you to see details within your subject. Low light photography allows you to capture shadows and highlights.
-
Take Pictures of People. You can share the things that you love most by taking photos of others.
For more information on how to take better photos, read our article: 5 Tips to Improve Your Photography Skills With A Smartphone
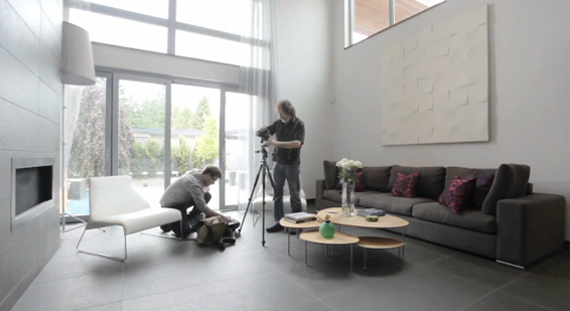
Do I Need A Tripod?
This is a question everyone asks. While a tripod isn’t necessary every time, it is useful.
It helps you keep your camera steady while taking pictures at slow shutter speeds. A tripod is a great option for landscapes and other stationary subjects.
However, using a tripod to photograph moving subjects like people or sports can result in blurriness. How do you decide which situations are best served by a tripod.
A tripod is useful in situations where you want to take pictures of fast action and stationary subjects. Examples include:
-
Sports
-
People
-
Landscapes
-
Close-ups
-
Macro shots
This test will help you determine if you need a tripod. Take your camera and hold it still. Then, look through the scope. You will need a tripod if you see blurred lines and movement.
If you don't see any blurring, you probably won't notice any improvement by adding a tripod.
These are just a few tips to help you decide whether or not to purchase a tripod.
-
Your tripod should have smooth legs. This will stop unwanted vibrations shaking your camera.
-
Choose a sturdy tripod. Some tripods may be made from plastic, which can make them less durable. Consider a tripod made of metal.
-
Consider purchasing a remote release. Remote control allows you to remotely control your camera. It can automatically fire the shutter when you press the button.
-
A tripod that can rotate 360 degrees is a good choice. This allows you to place your camera horizontally and vertically.
-
Remember that tripods can be expensive. Expect to spend around $100-200. However, you'll get lots of value for your dollar.
-
Accessories like memory cards and filters should not be forgotten.
-
Check your local stores before buying online. Many retailers offer free shipping.
-
Read reviews to determine what customers think about a particular product.
-
Ask family and friends who have similar products.
-
For customer feedback, visit message boards and forums.
-
Find user reviews online.
-
Amazon.com is a website that allows you to compare prices and get customer feedback.
-
View photo galleries to see the different uses of tripods by photographers.
Statistics
- By March 2014, about 3 million were purchased monthly, about 30 percent of the peak sales total. (en.wikipedia.org)
- In this case, 100% of readers who voted found the article helpful, earning it our reader-approved status. (wikihow.com)
- Get 40% off Adobe Creative Cloud(opens in new tab) (creativebloq.com)
- There are people out there who will pick at flaws they can only see in 100% crops of your photos. (wikihow.com)
External Links
How To
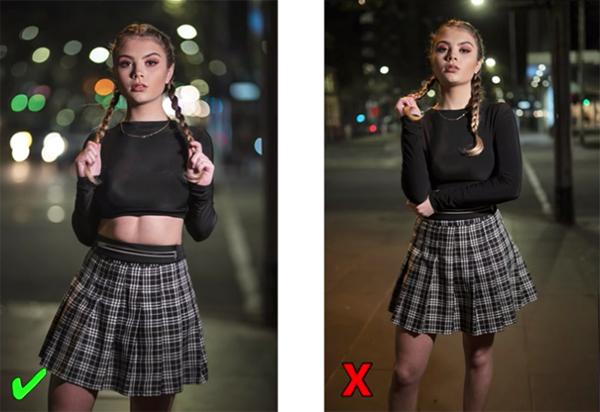
How to photograph in low light conditions
Low-light photography means taking photos in dimly lit areas. This requires special equipment and techniques. Controlling exposure, white balance, sharpness, and contrast are the main challenges. There are two kinds of low light photography. Flash photography works well when you have enough light. However, if there's not enough natural light around you, you'll need to use flash. You might need a flash if your subject is outside but indoors. You can also shoot at night when the moon is shining. This way, you'll get some nice colors and shadows. Another option is to capture at twilight. Twilight happens when the sun has set but there is still daylight.
Also, you might want to try long exposures. You can record images even after the shutter is closed for several minutes. The shutter must be closed so that the camera only records light that hits the sensor. This light continues to fall onto a photo sensor throughout a prolonged exposure. The shutter is still closed so no light can enter the lens. You will see very little movement as a result. To ensure a clear image, you should turn off all automatic settings such autofocus or exposure. Before you begin shooting, adjust your ISO setting. An ISO setting of 200 gives you more flexibility to control how bright or dark your image looks. The shutter button should be pressed quickly when you are ready to take the photo. This causes the shutter to close completely. You should then hold down the shutter button for as long as possible. You can prevent any additional light entering your camera by holding the shutter button down. Once you have taken the image, wait for a few seconds before you release it. This will allow the camera to process your image. While the image is processing, you can see your photos on your computer monitor. When you are happy with your photos, save them to the computer.